Propeller Powered Balloon Helicopters
For today's Curiosity Machine classes, our last meeting of the four-week session, we did an exciting project from the Curiosity Machine website: balloon helicopters!
We learned about different kinds of energy, particularly elastic potential energy. Elastic potential energy is the potential energy stored when you bend, stretch or deform an object, and that energy converts to kinetic energy as the object bounces back. Here's a great website that explains it pretty well: Physics 20 Project.
We discussed examples of elastic potential energy using a Family Feud presentation I made on Scratch. You can click on the image below to see the project, though it's supposed to be used as a tool for discussion:
The project itself was challenging and I'm glad I worked on my sample ahead of time. But it's so exciting to see those balloons fly! First, you have to cut a boba straw to about the same length as the rubber band you plan to use (when it's at equilibrium). Using a glue gun, you attach a washer to one end of the straw--this cuts down on friction from the blades. (I did this step in advance for the kids. Most of their washers popped off though, so there must be a better way to do this...)
Unbend a paperclip--this will be the rotor that your blades will turn around on. I cut blades out of paper plates, poked the paperclip through the plates and secured the clip to the blades with masking tape. Then I brought my rubber band around one of the blades and over the paperclip, right in between the blades.
Now you have to pull the rubber band gently through the straw via the hole in the washer. It's very important that the rubber band and straw be the same approximate length. The rubber band will function as an elastic motor with the straw as the motor casing. The washer will be touching the paperclip. Pull the rubber band completely through the straw so that some of it peeks out the other end. It helps if you use your skewer to push it through. Once part of your rubber band is sticking out, draw your skewer through its loop. This will be the base for your helium balloons.
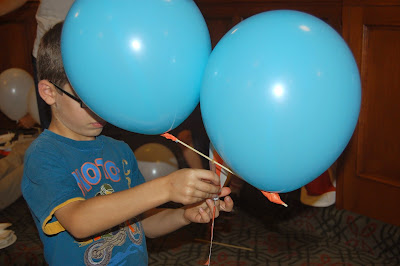
Attach the balloons to the skewer using masking tape. This is very important because at first, I tried simply tying them to the middle of my skewer, and what happened? It made the skewer spin around frantically, which is NOT the part of your helicopter that you want to be spinning. Now one of the kids noted that no matter what, the balloons tend to spin, which is taking energy from your propeller. This is true, I'm not arguing with that!
Do you notice anything else wrong about the above picture? It's not really supposed to float up to the ceiling and sit there. You can't see how your helicopter works if it's doing that. My first attempt had too many balloons, and not enough of a balance between the lift of the helium and the weight of my helicopter motor. Ideally, you want your balloons to be propelled by the propeller and not by their own helium. They should not be able to float too high on their own. To fix this, I removed two of the balloons and affixed the remaining two to either end of the skewer with masking tape. You could also add more material to your blades to make them heavier, larger and stronger.
Once you're ready, spin the blades around many times to wind up your elastic band. Then let go and watch it fly!Here are some photos and videos I took of the kids' projects. I don't have any good video editing software but I found a place online (videotoolbox.com) where I could at least merge lots of short videos together into one file. This way you don't have to do too much clicking! There were a couple of videos that didn't make it into this mix because the website only lets you merge 15. But it'll give you a quick, one-minute idea of how everybody's projects came out!
I'm gonna miss doing these classes, but I do need to find a better work balance with all the programs I have going on. I think I'll do a science program about once a month, and will start doing this in the Spring. I'll keep everyone posted when the next one will be. Thanks for participating and working so hard on these very challenging projects! I hope you had as much fun as I did!


Comments
Post a Comment